Build your first app with the V-I-B-E framework
Introduction: From Idea to App
Now that you understand what vibe coding is, it’s time to start turning your idea into something buildable. This step is all about structuring what’s in your head so that an AI can help you build it—without needing to know how to code.
You’ll use a conversational AI (like ChatGPT or Claude) to help you clarify your idea, break it down into parts, and shape it into prompts that work in vibe coding tools like v0 or Replit.
Why Structuring Your Idea Is Important
AI can only help you if it knows what you want. If your idea is too vague, you’ll get vague results.
Think of your idea like decorating a room. If you say, “Make it nice,” the designer has no direction. But if you say, “I want a cozy reading nook with warm lighting and a place for books,” now they can build something you’ll actually love.
By structuring your idea first, you:
- Gain clarity on what you’re actually building
- Break the idea into small, buildable pieces
- Give better instructions to the AI
- Avoid spinning in circles once you start building
To do this well, we’ll use the V-I-B-E framework.
Introducing the V-I-B-E Framework
To make your idea easier to build, we’ll use the V-I-B-E framework. This is a simple step-by-step way to organize your app idea—starting from your vision and ending with a connected flow of screens. What’s powerful is that you’ll walk through each part of this framework with the help of an LLM like ChatGPT or Claude.
The LLM helps you structure your idea, clarify what matters, and shape your thoughts into natural language prompts you can paste directly into a vibe coding tool like v0 or Lovable. For non-technical builders, this approach bridges the gap between concept and code-free creation.
Here’s what each step in V-I-B-E helps you do:
| Step | What It Helps You Do |
| V — Vision | Define what you're building, who it’s for, and how it should feel. This becomes your anchor. |
| I — Isolate | Break the idea into essential parts—like key screens or features—so you don’t try to build everything at once. |
| B — Build | Pick the most valuable starting point and write a prompt that creates your first buildable component. |
| E — Ensemble | Review and refine the prototype. Test features, add or remove requirements. |
At each step, you’ll ask the LLM specific questions, get helpful responses, and translate those into prompts you can use with your vibe coding tool. Let’s walk through the process using a sample idea: a team to-do list app.
Building a To-Do List App
To make this guide actionable, we’ll walk through a real example: building a team to-do list app using Replit as our vibe coding tool. Before we jump into Replit, we’ll use Claude to help us clarify and structure the idea. You can use any LLM like ChatGPT or Gemini.
This process will show you how to take a simple concept, use an LLM to shape it using the V-I-B-E framework, and generate specific prompts you can use to start building in your vibe coding tool.
Step 1: V — Vision
Write your idea in plain language. Don’t worry about polish—just describe what you want to build and give the LLM the context of where you want to build it. It is always useful to have the LLM ask you questions about your idea, to help structure it and create prompts for Lovable.
Example LLM Prompt :
LLM Response:
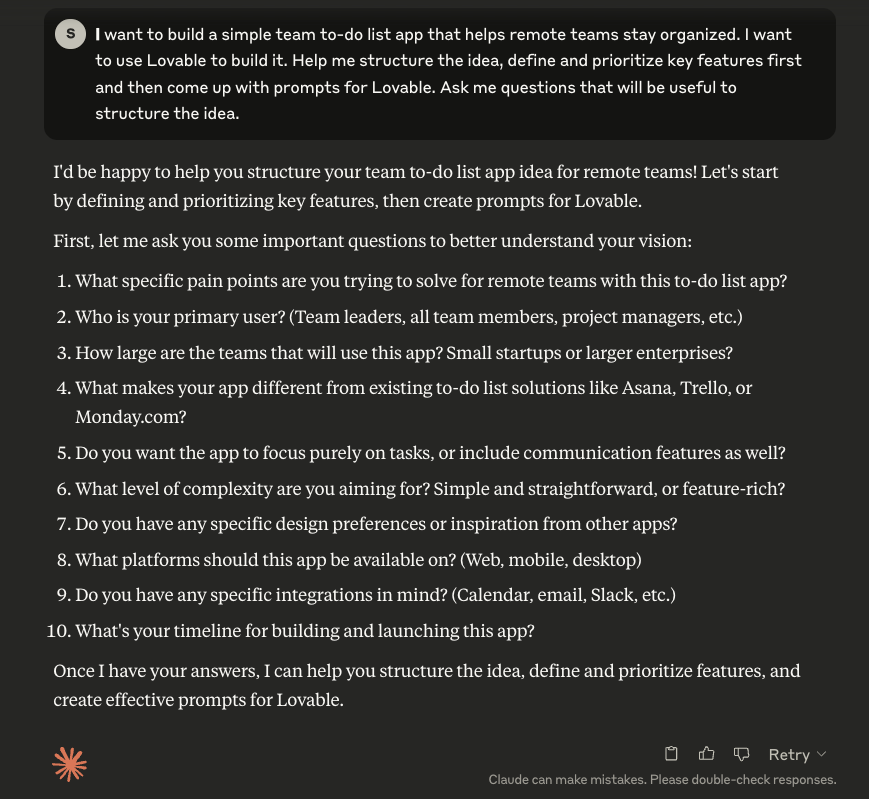
The LLM responds with a structured set of questions that will help you frame the idea better and decide upon which features are important to you.
Your Followup Prompt:
LLM response:
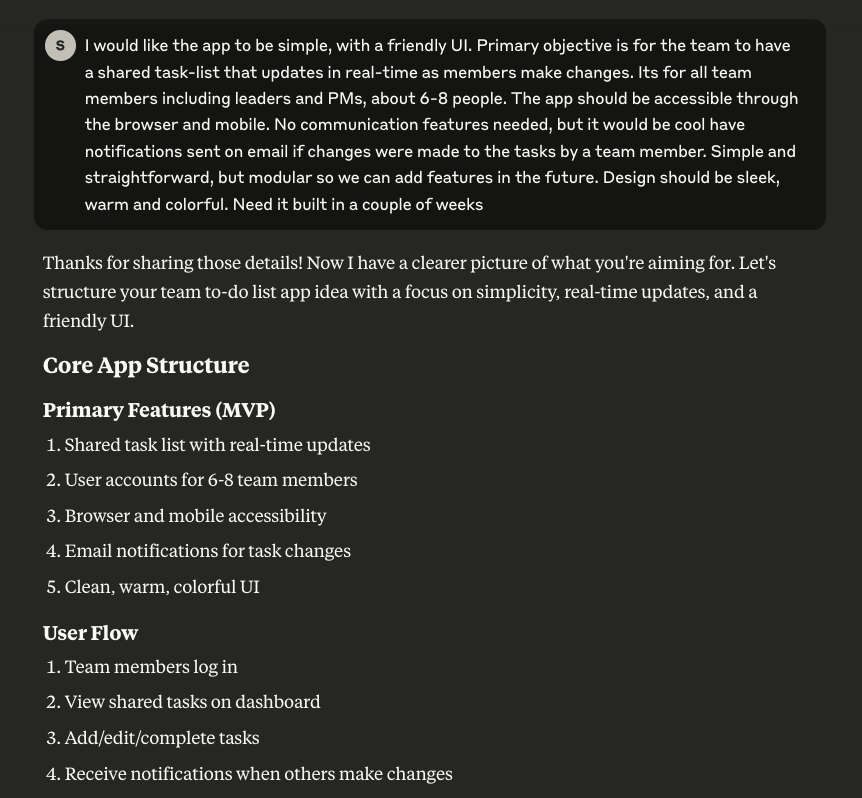
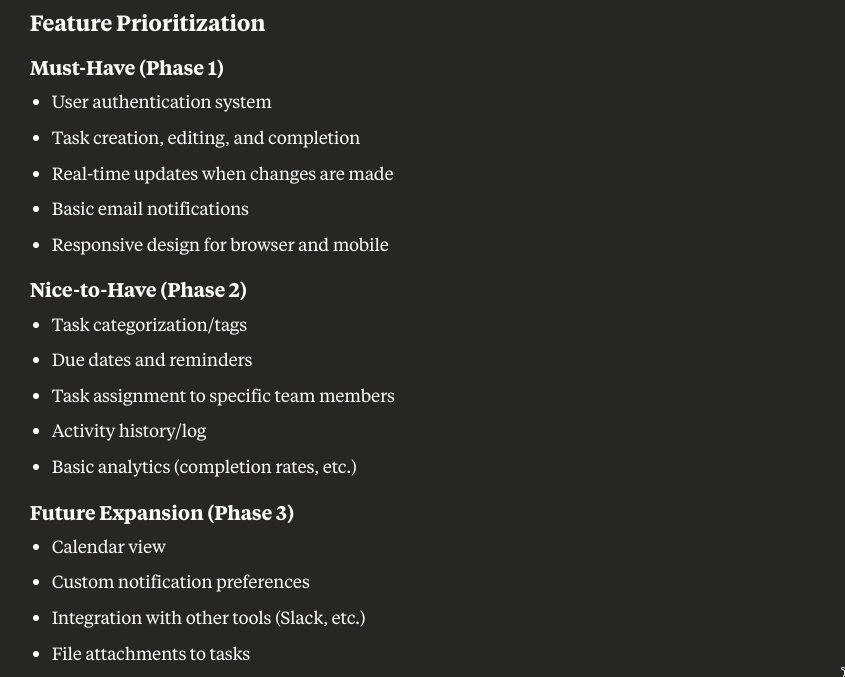
Step 2: I — Isolate
Now that the LLM has structured your features at a high level, in the next step you can start prioritizing core features for the first build. You’ll identify what’s essential for an MVP (Minimum Viable Product) and what can be added later as enhancements.
This helps you:
- Focus on building only what matters first
- Avoid scope creep
- Stay aligned with your core value proposition
Let’s use the LLM to help us define and organize these pieces.
Your Followup prompt:
LLM response:
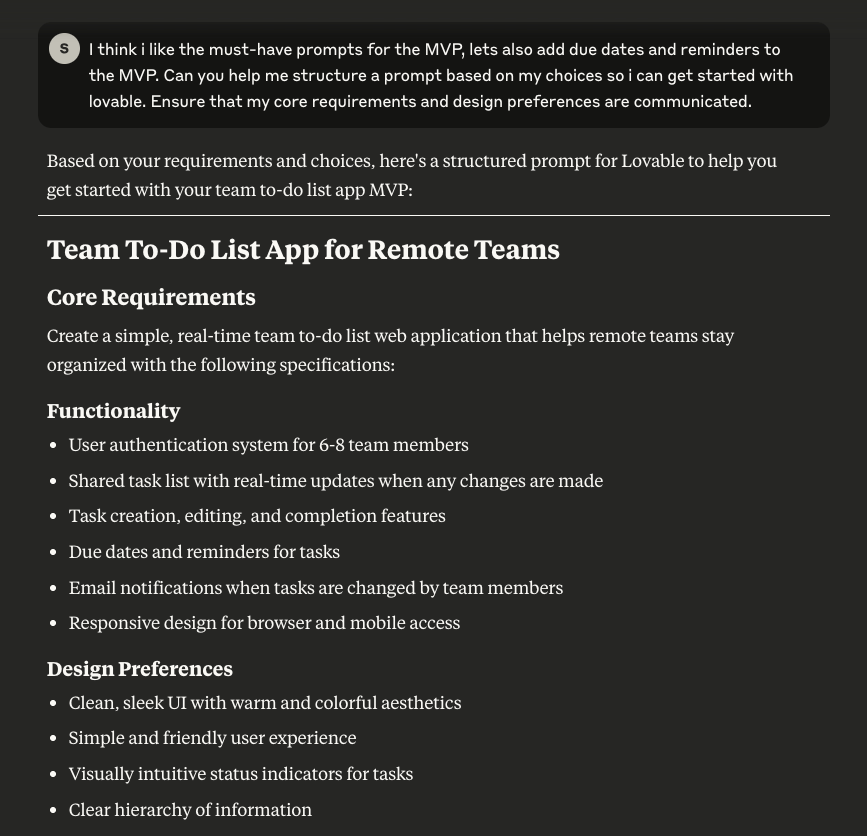
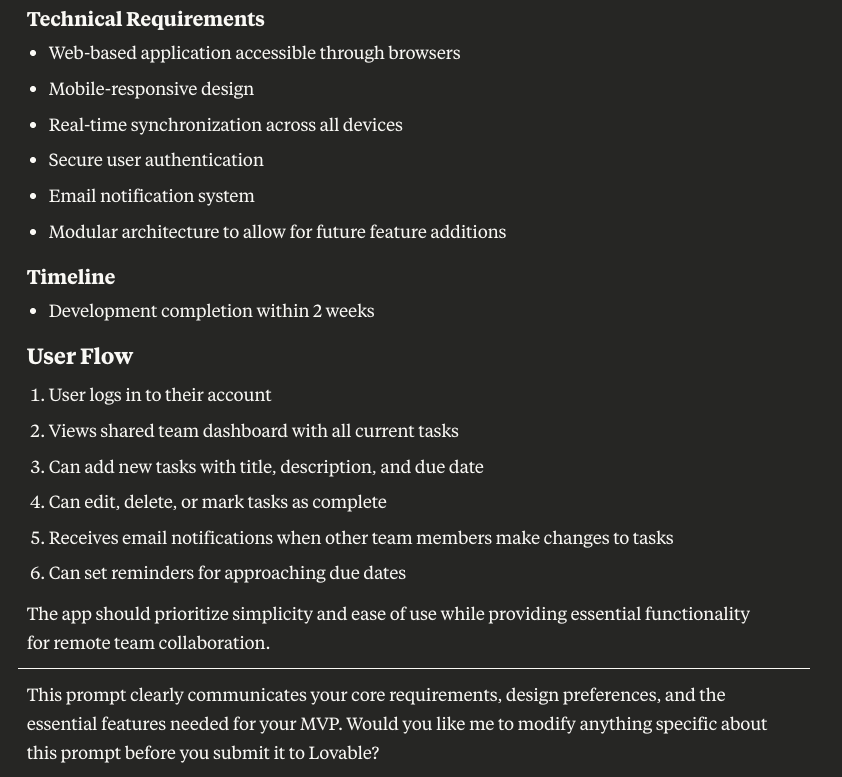
Now you have a prompt to get started with Lovable. Lets try that out !
Step 3: B — Build
Now that you’ve clarified your idea and prioritized your features, it’s time to start building your app. We will use Replit for demonstrating the build
In this step, we’ll take what we’ve structured so far and begin prototyping the app’s core interaction. Specifically, we’ll take the prompt you generated in Step 2 and input it directly into Replit to start designing your To-do list app.
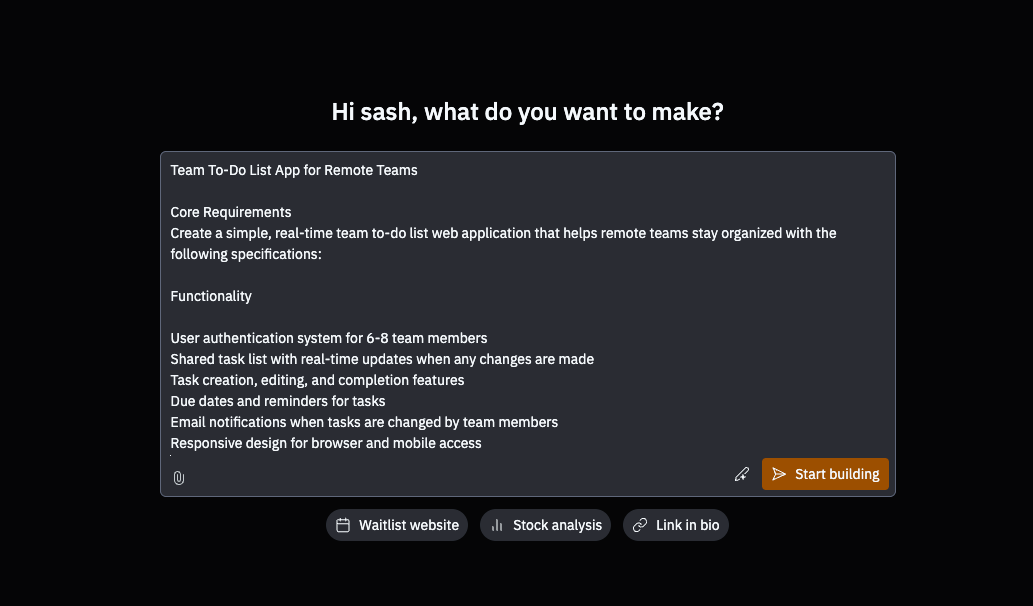
Copy the prompt to Replit chat window and click on start building
Replit then analyzes your requirements, builds and presents a plan and asks for your approval. The pre-planning step is unique to the Replit platform, you can iterate on the plan before you get started. If even suggests additional features that might be useful.
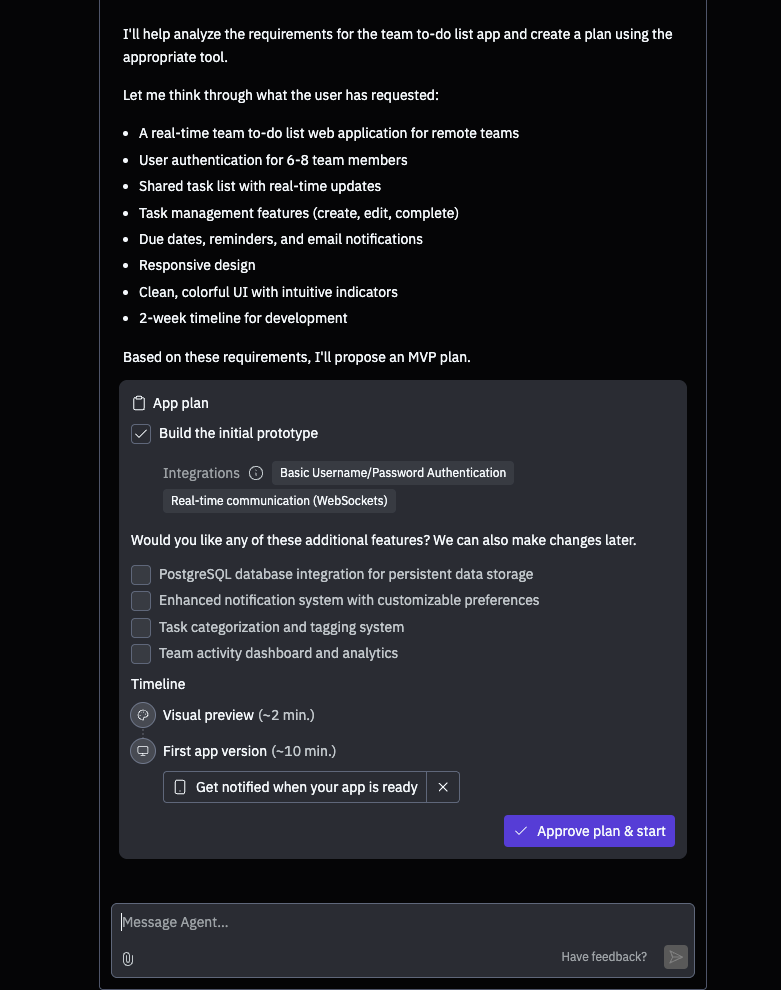
The PostgreSQL integration will be useful for persistent storage, so lets check that box and click on “Approve plan and start”. After a few minutes, We have a prototype with a login screen.
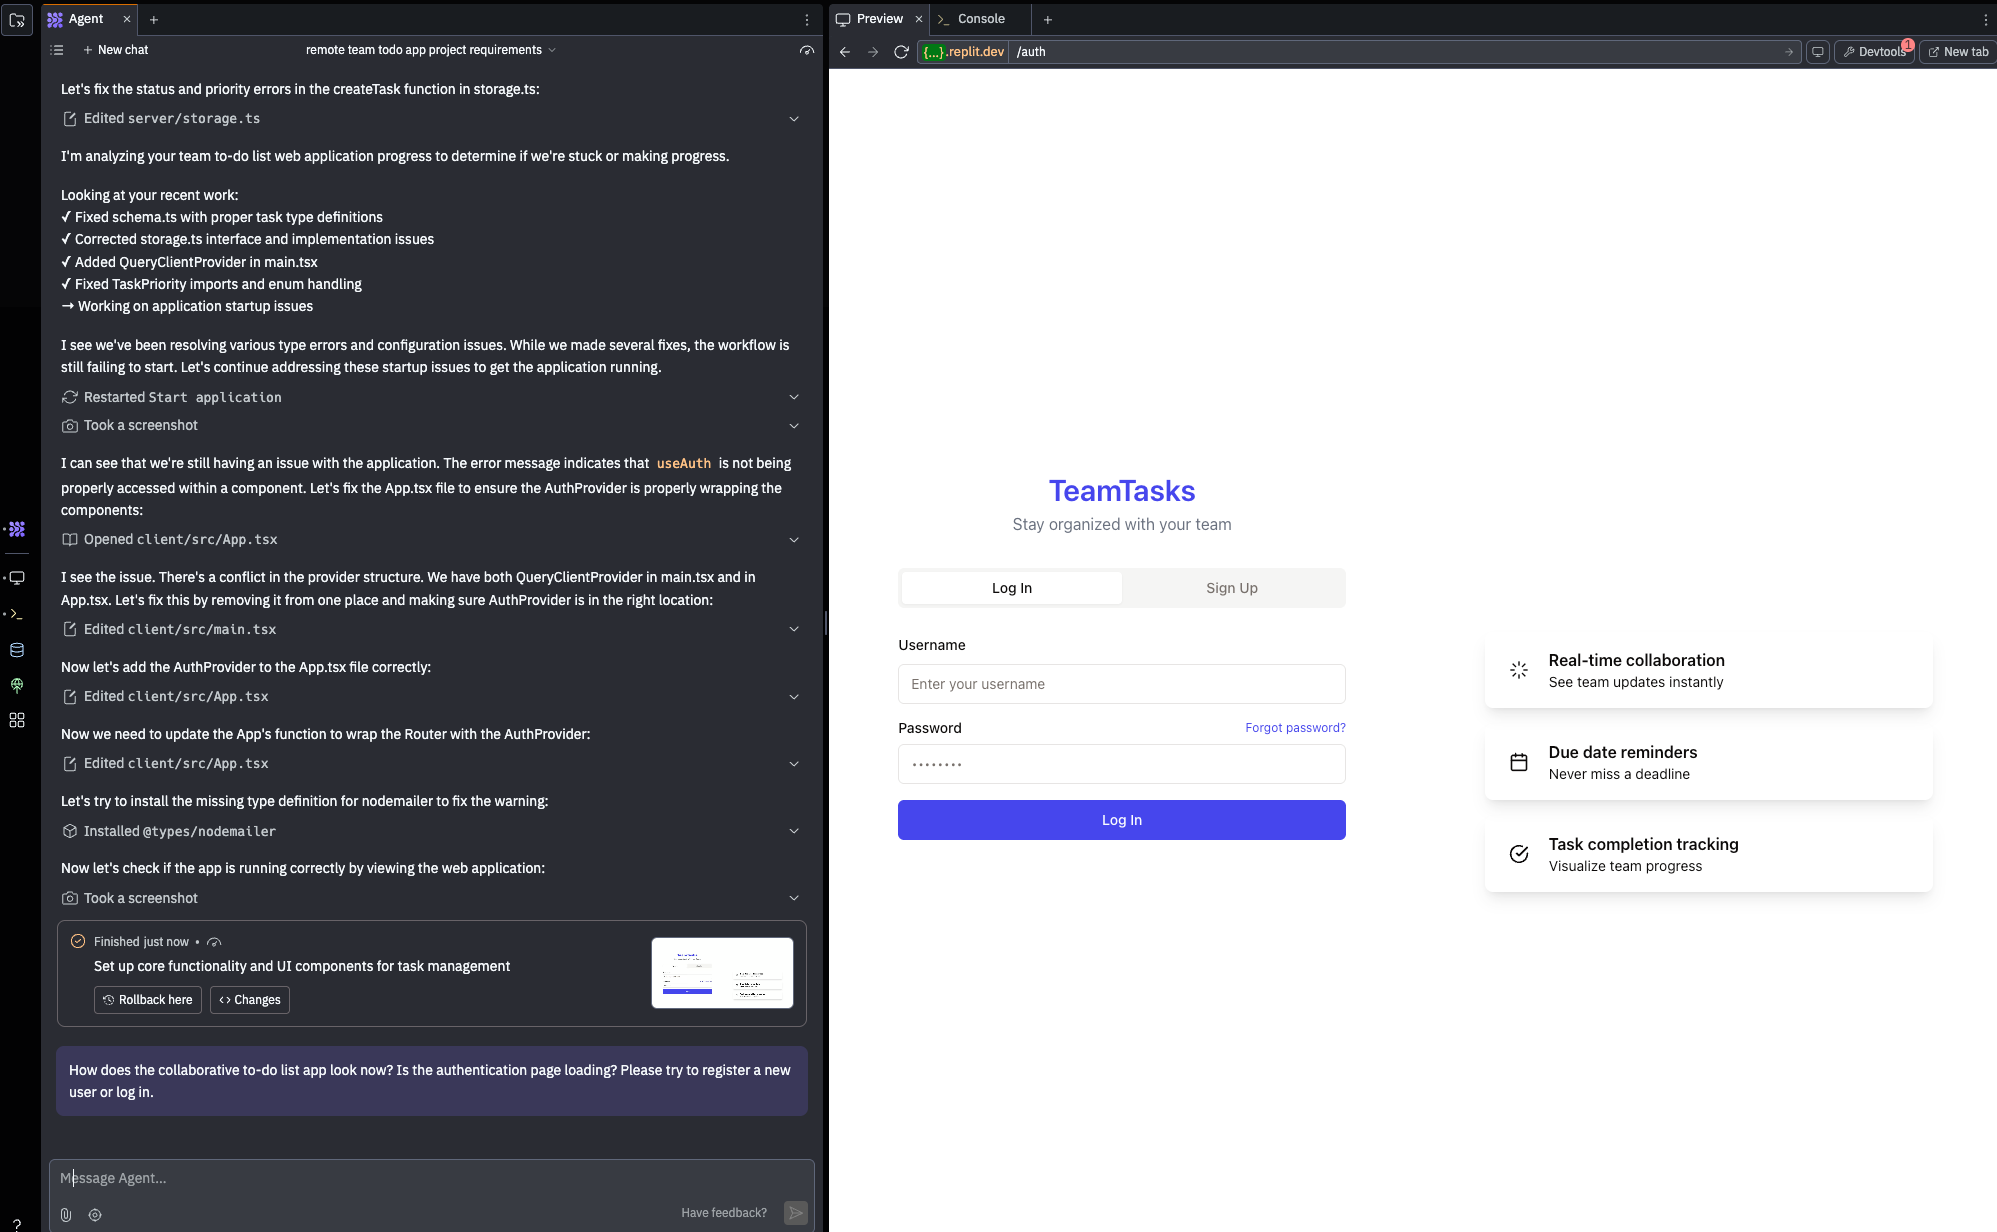
We clicked on the “Sign up” button, created a user login and we have a functional app where we can create tasks and assign to team members.
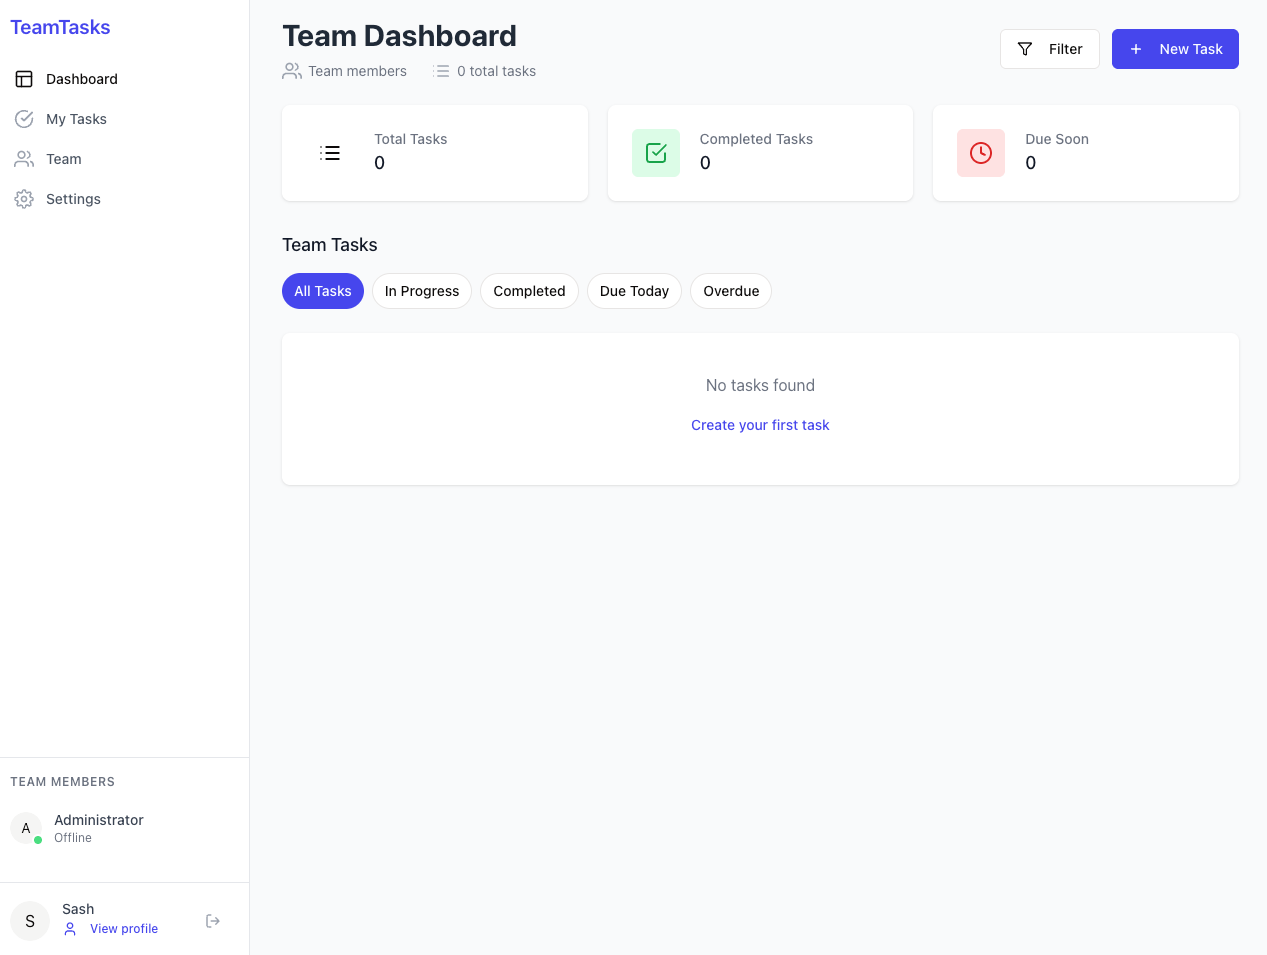
Next, we start evaluating the prototype and start fixing what doesn’t work.
Step 4: E — Evaluate
You’ve built your first screen in Replit—great! Now it’s time to step back and assess what you’ve got.
This phase is about evaluating the initial prototype and identifying what to improve. Vibe coding tools give you a fast starting point, but they usually need a few rounds of feedback to really match your intent.
First - Try out all the features and see what works and what doesn’t. In our case, there was a date picker issue while creating a new task. We took a screenshot of the error and pasted into the chat window, along with a basic description of where the error occurs.
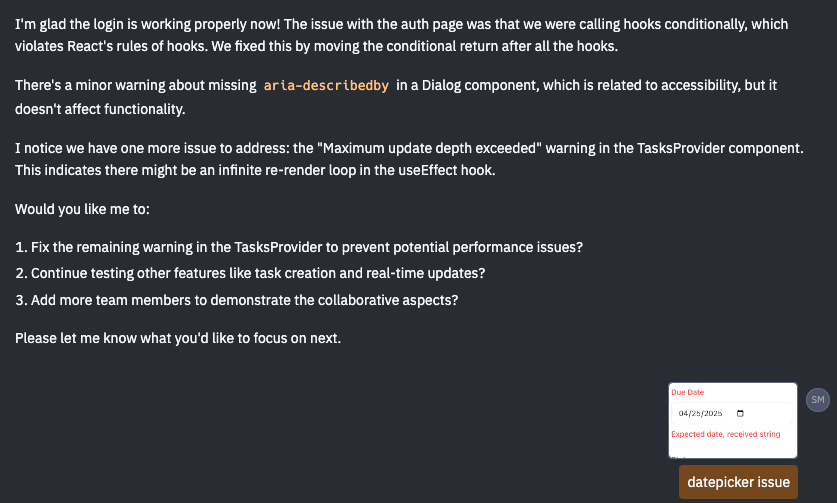
The Replit agent then will proceed to troubleshoot the issue. It may take a few times for it to arrive at a solution. For best results, paste screenshots of any errors that you come across. After a few tries, the issue was fixed and we are able to create a task.

Next, click on every button in the UI and see if they work. In our case, All the buttons on the left were disabled and the filter on the top right didn’t work. Prompt the Agent in detail about fixing those issues.

It is important to remind the agent that it analyzes problems as whole and doesn’t attempt to fix them in isolation. This is especially useful when the agent gets stuck in a loop trying to fix and issue.
After a few iterations, the My tasks page worked ! However, the filter button still needs work, so lets add a task for it and remind the admin.

It is very important to remember that this is an iterative process. The issues need to be tackled one by one. Have patience and keep prompting with context and screenshots as you go along.
Knowledge Check
1 / 5What is the primary goal of the V-I-B-E framework as described in the guide?